Getting Started in High Power Rocketry
 Getting started in high-power rocketry doesn’t have to feel intimidating. There’s plenty to learn, but most student groups begin with limited experience and grow into it step by step. As you work through the basics, your confidence builds, and what looked complicated at first starts to make sense. The process is part of the enjoyment: you learn by doing, solving real problems alongside classmates who are figuring it out with you.
As you move from mid-power flights into the requirements for high-power certifications, you’ll find that the path is more approachable than it appears. You don’t have to master everything at once. Break the work into manageable pieces, lean on mentors when needed, and take each milestone as it comes. It’s challenging in all the right ways, and when you keep a steady pace, the whole experience becomes both rewarding and genuinely fun.
Low Power, Medium Power, High Power, and Certification Levels
Model rocket motors are generally broken down into two groups, low power and medium power. Low power motor are designated A through D and can often be purchased at discount and hobby stores. Medium power motors are designated E through G and can also be purchased at these stores, but with less availability. There is no certification required to purchase or fly low and medium power rocket motors.
High power rocket motors are designated H and above. High power motors are usually not available at discount and hobby stores. High power motors are best purchased from rocket vendors either online or at a local launch. High Power Rocketry (HPR) is self-regulated by those in the hobby as an alternative to government regulation. TRA and other national rocket organizations have agreed on a tiered certification program to regulate the use of HPR motors. Level 1 certification allows a person to purchase and fly H and I powered motors. Level 2 provides for use of J, K, and L powered motors. Level 3 certification allows a person to use M power and larger motors. Motor vendors normally ask for certification level evidence in the form of your TRA membership card (which displays the certification level) when purchasing HPR motors.
Junior Members (12-17 yr old)
Junior members 12 to 17 years old can participate in the
Tripoli Mentoring Program and certify as Junior Level 1.
Student Members (18 – 25 yr old)
If you are age 18 to 25 and a student, you can join Tripoli as a student member, which is discounted from the senior membership rate. Student and senior members participate in the regular certification process to fly HPR rockets and motors.
Note that HPR certification is an individual activity, NOT a team activity. ALL certification rockets must be built, prepped, and flown solely by the individual certifying.
Start With Mid-Power Rocket
If you are a student or senior member starting out in HPR with no prior experience in rocketry, it is highly recommended that you first build a medium power rocket and fly it on a E, F, or G motor. This is a good way to learn rocketry skills with less expensive motors. With planning, a mid-power rocket with a 29mm motor tube can be used for a Level 1 certification.
Most kits do not include a parachute or motor retainer. You will likely have to determine the correct size parachute to use and buy it separately. The motor retainer prevents the motor from moving forward under thrust or moving backward when the ejection charge fires. You will likely have to purchase a motor retainer in addition to your kit, and consider the retainer installation before building the kit.
FAA Rocket Class Designations
The U.S. Federal Aviation Administration (FAA) has defined three classes of amateur rockets. Class 1 rockets (Model Rockets) use no more than 125 grams (4.4 ounces) of propellant and weigh no more than1,500 grams (53 ounces) including propellant. Class 2 rockets (High Power Rockets – HPR) can have motors with up to 40,960 N-s (9,208 pound-seconds) of total impulse. Class 3 rockets have motors with more than 40,960 N-s (9,208 pound-seconds) of total impulse. No FAA waiver is required to launch Class 1 rockets. An FAA waiver is required to launch Class 2 and Class 3 rockets.
HPR motors
HPR motors come mostly in standard size diameters of 29mm, 38mm, 54mm, 75mm, and 98mm. Within each diameter there are different lengths depending on the total impulse of the motor. For a given motor diameter and length there may be different motors with slightly different total impulse depending on the propellant type. There are propellants that produce different colors of flame and smoke, with some motors emitting sparks during the burn.
Here are defined classes of HPR motors based on the total impulse of the motor.
|
Motor Class
|
Total Impulse (N-s)
|
TRA Certification Level
|
Typical Motor Diameter (mm)
|
Motor Deployment Capable
|
FAA Rocket Class
|
|
H
|
160.1 – 320
|
1
|
29, 38
|
Yes
|
2
|
|
I
|
320.1 – 640
|
1
|
29, 38, 54
|
Yes
|
2
|
|
J
|
640.1 – 1,280
|
2
|
38, 54
|
Yes
|
2
|
|
K
|
1,280.1 – 2,560
|
2
|
54, 75, 98
|
Sometimes
|
2
|
|
L
|
2,560.1 – 5,120
|
2
|
54, 75, 98
|
Sometimes
|
2
|
|
M
|
5,120.1 – 10,240
|
3
|
75, 98
|
No
|
2
|
|
N
|
10,240.1 – 20,480
|
3
|
98
|
No
|
2
|
|
O
|
20,480.1 – 40,960
|
3
|
98, 152
|
No
|
2
|
|
P
|
40,960.1 – 81,920
|
3
|
|
No
|
3
|
|
Q
|
81,920.1 – 163,840
|
3
|
|
No
|
3
|
HPR motors can be either single use or reloadable. Single use motors are expendable and the motor case is thrown away after the propellant has burned. Reloadable motors utilize reuseable motor hardware that consists of a case and closures, and sometimes a seal disc. A reload kit for that specific size motor hardware comes with nozzle, motor liner, propellant grains, delay grain, O-rings, and a small amount of Black Powder (BP) for an ejection charge. The motor is built (assembled) using the motor hardware and the reload kit. After burning the motor, it should be disassembled, the used reload parts thrown away, and the motor hardware cleaned.
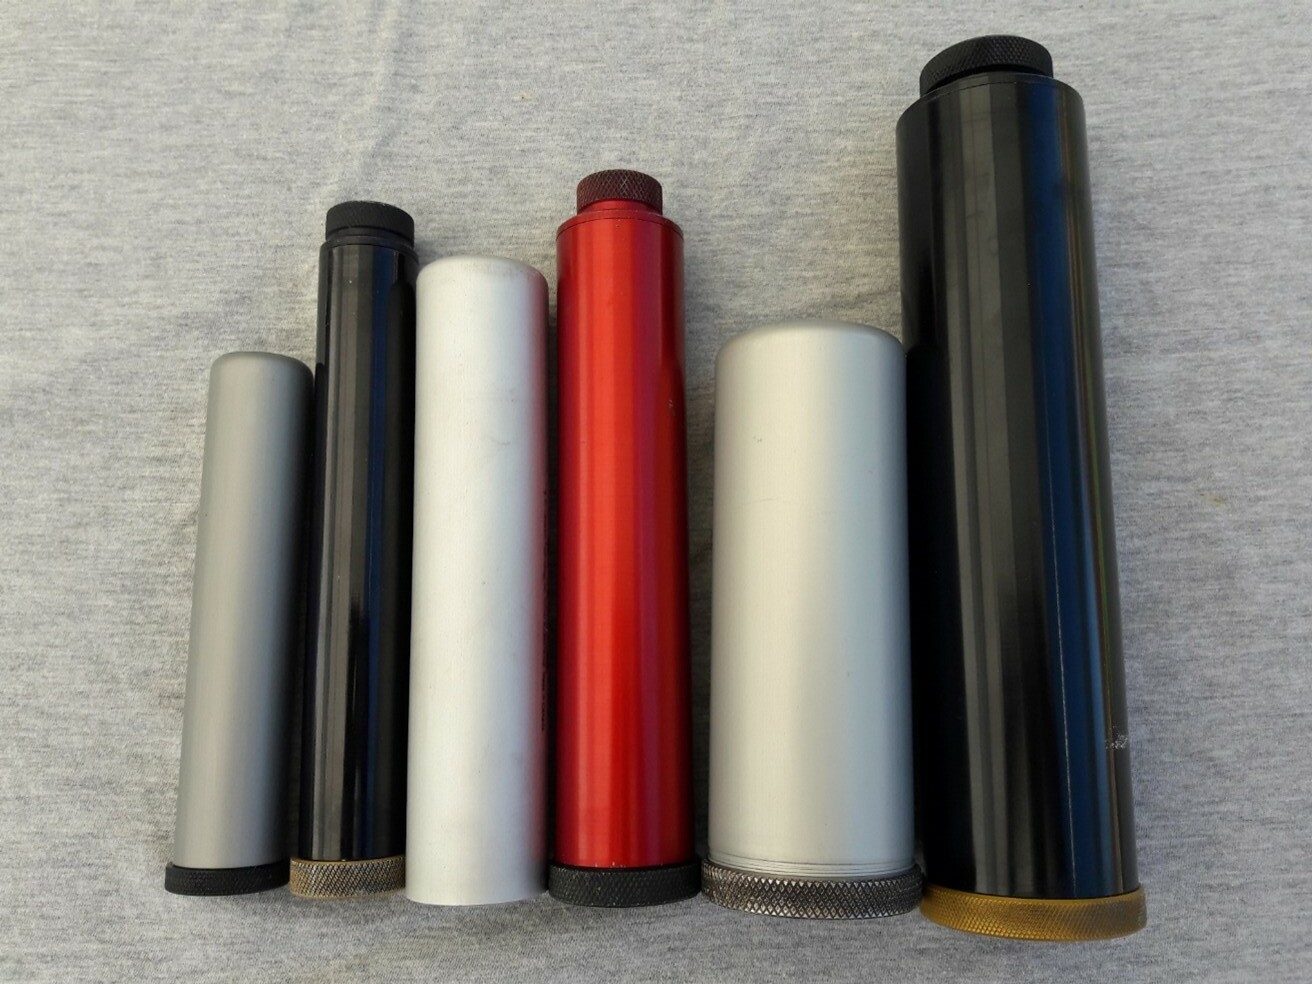
29mm, 38mm, and 54mm Reloadable Motor Hardware for 2 Different Motor Manufacturers
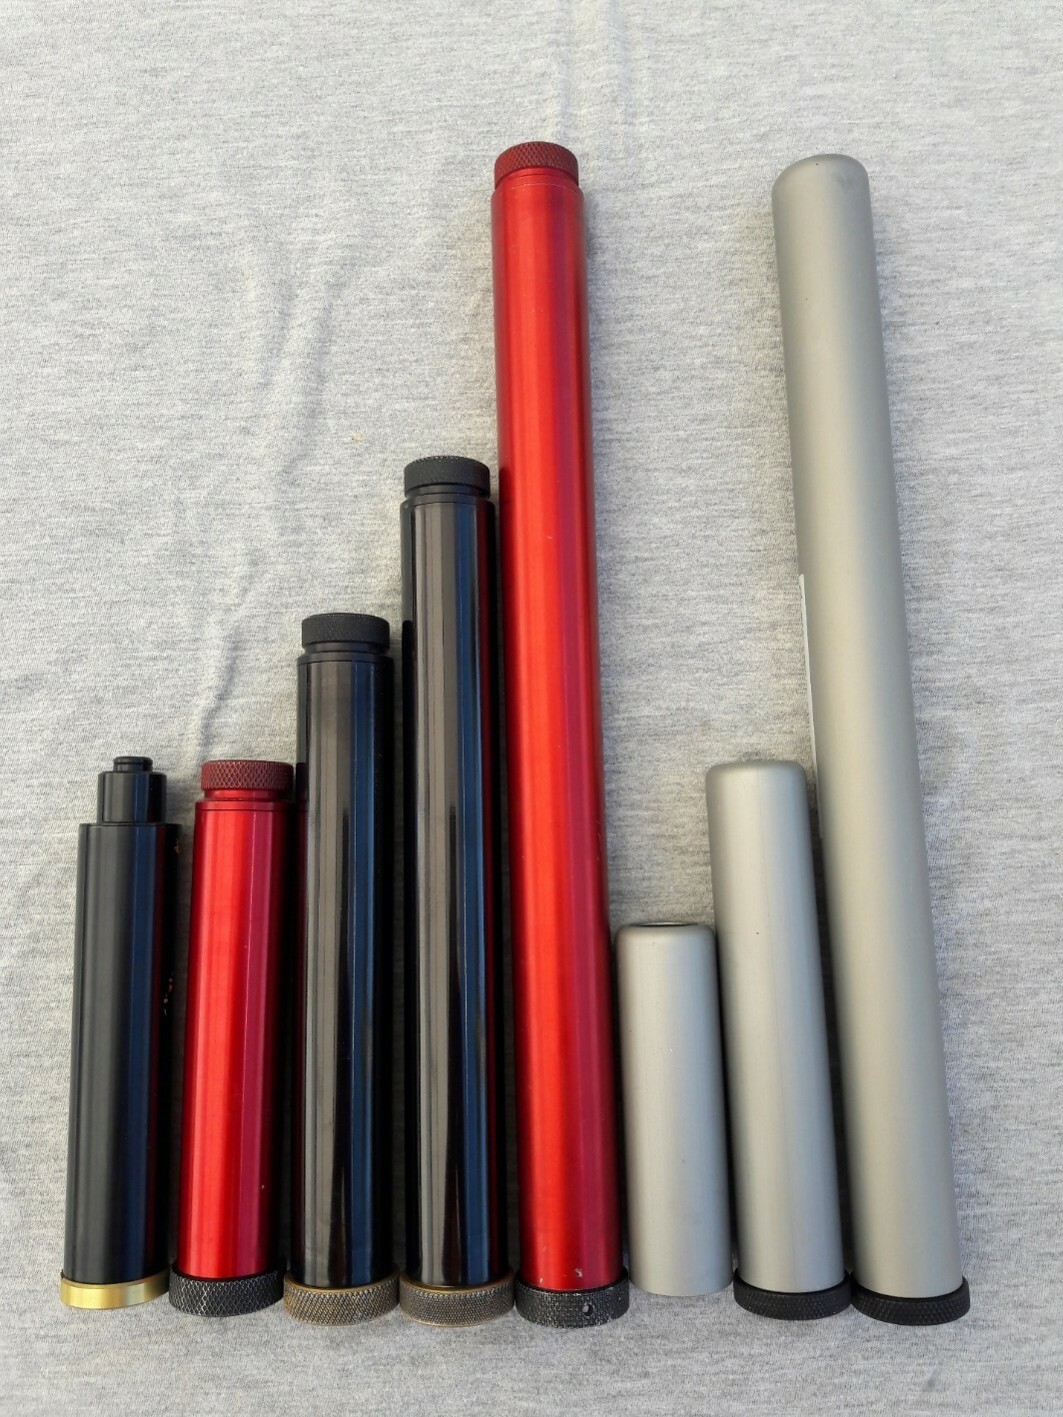
Various Size Reloadable Motor Hardware, all 29mm, for 2 Different Motor Manufacturers
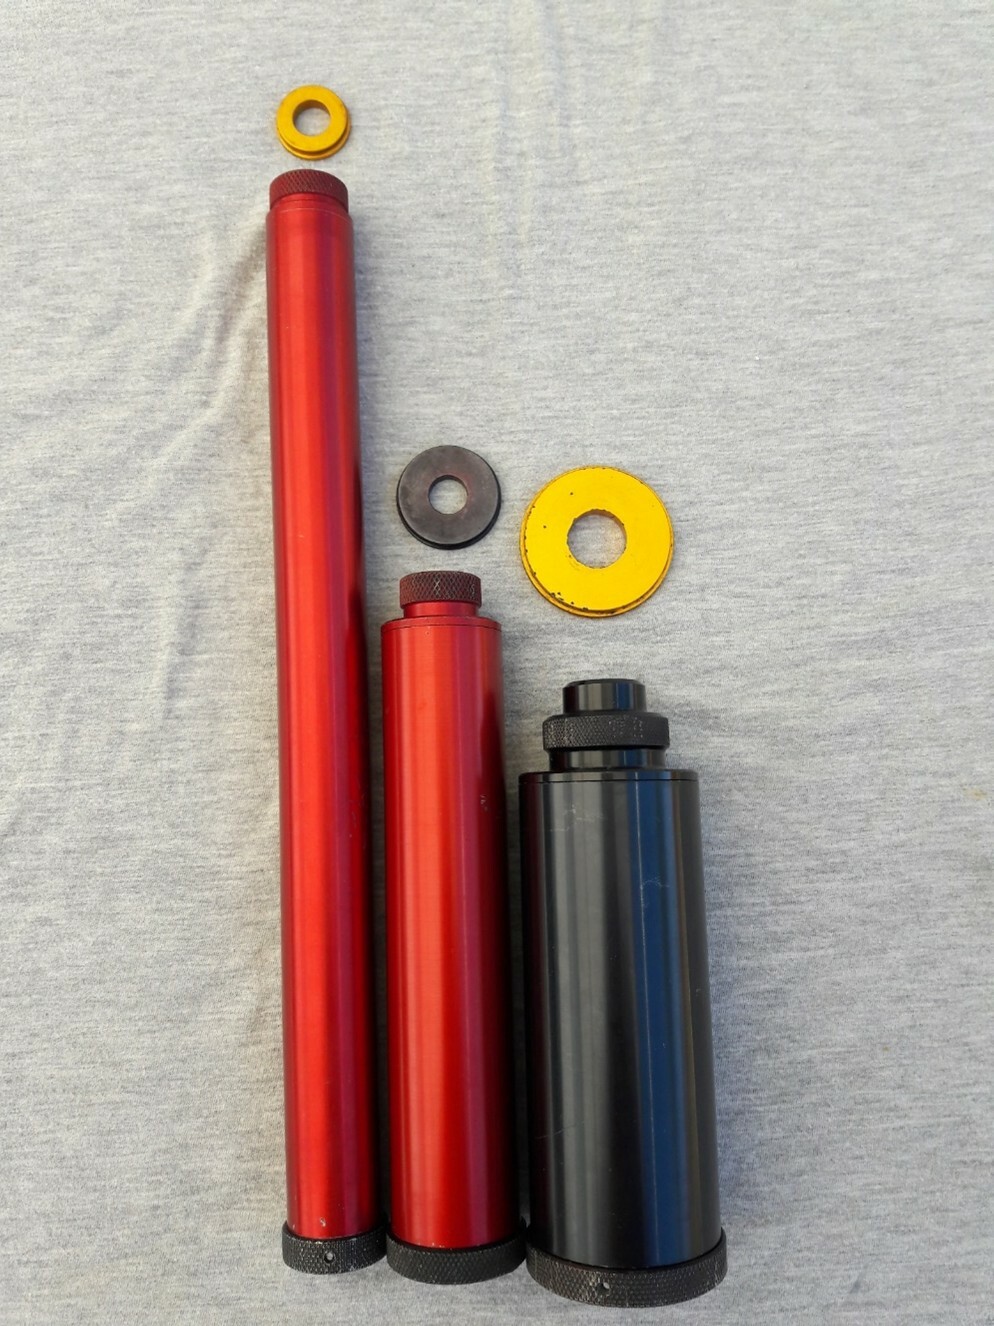
29mm, 38mm, and 54mm Reloadable Motor Hardware, All for Small I Motors
Motor deployment (a.k.a. motor ejection) is the process where the delay grain burns and sets off the BP ejection charge at the end of its burn. Optimally, the ejection charge goes off and deploys a parachute at apogee when the rocket is stalled or moving very slowly. Both single use and reloadable motors require adjusting the delay element to have it burn out at apogee. The amount of delay is dependent on the type of motor used, and the rocket size and weight. Flight simulations can be very helpful in determining the best delay to use.
Most motors that are 75mm in diameter or larger are not capable of motor deployment and require flight electronics to deploy one or more parachutes.
Motor Retention
When installed in the rocket, the motor must be retained from moving forward while burning, and from moving backward when the motor ejection charge goes off. If not retained while burning, the motor may forcefully burn up through the rocket, usually destroying the rocket in the process. If the rocket is airborne when this happens, all the parts fall to earth with nothing to slow them down. If the motor is not retained when the ejection charge goes off, the motor may be ejected from the rocket and the recovery system not deployed. This will result in the spent motor coming in fast and the rocket coming in ballistic. There is danger to property and people in this scenario.
 Various Motor Retainers Including Homemade (Center Bottom)
HPR Recovery by Motor Ejection
Unlike low and mid-powered rockets, it is recommended not to use elastic in the shock cord. When elastic stretches, it stores potential energy, which is released when it contracts. In the process it can cause damage to the airframe or nose cone when they collide. In HPR it is best to use a shock cord made of nylon or Kevlar 3 to 5 times the length of the rocket. The length will bleed off the ejection energy.
The parachute and non-Kevlar shock cord must be protected from the hot ejection charge gases. There are various ways to do this. One is to put cellulose insulation (a.k.a. dog barf), which is biodegradable, between the forward end of the motor and the parachute. Another is to wrap the parachute and non-Kevlar shock cord in a Nomex cloth (a.k.a. Nomex blanket). See the parachute packing videos below. Pistons and baffles are also used. Any pistons should be at least one caliber (airframe diameter) long so they do not jam in the airframe.
Vent HolesA vent hole is required on the airframe just below the Nose Cone (NC) shoulder. One can put the vent hole on the rail side of the rocket so it doesn’t show in photos. The size of the vent hole depends on the volume of the airframe not filled with the motor.
Without a vent hole, the air trapped inside the airframe will retain its pressure. As the rocket rises, the outside air pressure drops. The higher pressure in the airframe can push the NC off. That usually causes the parachute to deploy. If the rocket is going fast, this can cause an airframe tear by the shock cord (a “zipper”), a stripped parachute (resulting in hard landing), or a broken shock cord (also resulting in a hard landing).
Initial Thrust to Weight Ratio
The initial thrust of the motor must be at least 5 times the total liftoff weight of the rocket in order to have the speed necessary for stable flight. Motor packaging includes a thrust curve where one can obtain the initial thrust of the motor. Then weigh the rocket with the motor to get the liftoff weight. Be sure both values are using the same units to calculate an accurate ratio.
Stability
Most commercial rocket kits have been designed to fly stable when using recommended motors. It is recommended to start with building a commercial kit. Later with more experience, one can design a rocket from scratch. Stability is achieved when the Center of Gravity (Cg) is more than one caliber forward of the Center of Pressure (Cp). The point where the rocket is balanced is the Cg. It requires calculation or a simulation to determine Cp. Any scratch built rocket must have its Cp determined and marked for the Range Safety Officer (RSO) to inspect at the launch.
Rail Guides
Not all kits come with rail guides, which are necessary to mount the rocket to the launch rail. The launch rail must be of sufficient length to keep the rocket stable until it builds up enough speed for the fins to provide stability. Rails generally come in two sizes, 1010 (1” x 1”) and 1515 (1.5” x 1.5”).
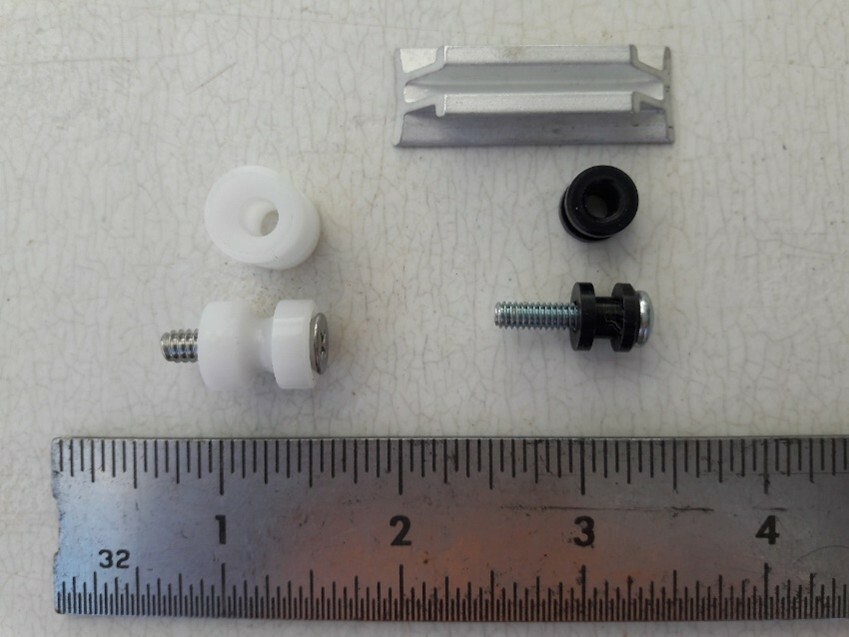 1515 (left) and 1010 (right) Rail Guides
Flying and CertificationNote that HPR certification is an individual activity, NOT a team activity. ALL certification rockets must be built, prepped, and flown solely by the individual certifying.
Look up your local Tripoli Prefecture (club) for where and when launches are held. Contact the local Prefecture before you come out and coordinate your plans, especially if you plan to certify. Expect the RSO to inspect your rocket and ask you questions before you are allowed to fly. Flying your rocket is performed in conjunction with the Launch Control Officer (LCO).
See the
High Power Certification Overview page on the Tripoli website for details on certification.